
Build a REALTIME CHAT APP in 5 MIN with React and Firebase

Software Engineer and Founder @AlterClass.io
In this video/article, I'll show you how to build a powerful real-time chat application like Discord or Slack in 5 MINUTES ONLY using React and Firebase.
You'll learn how to authenticate users with Google and work with real-time data using Cloud Firestore. Plus there is a BONUS at the end 😉
Let's go! 🚀 🔥
Watch the video on Youtube or keep reading.
Table of content
- What are we building?
- Create a React app
- Create a Firebase project
- Define the UI
- Google Authentication
- Read data in realtime from Firestore
- Add data to Firestore
- Bonus
- What's next?
- Conclusion
- Become a React Developer
What are we building?
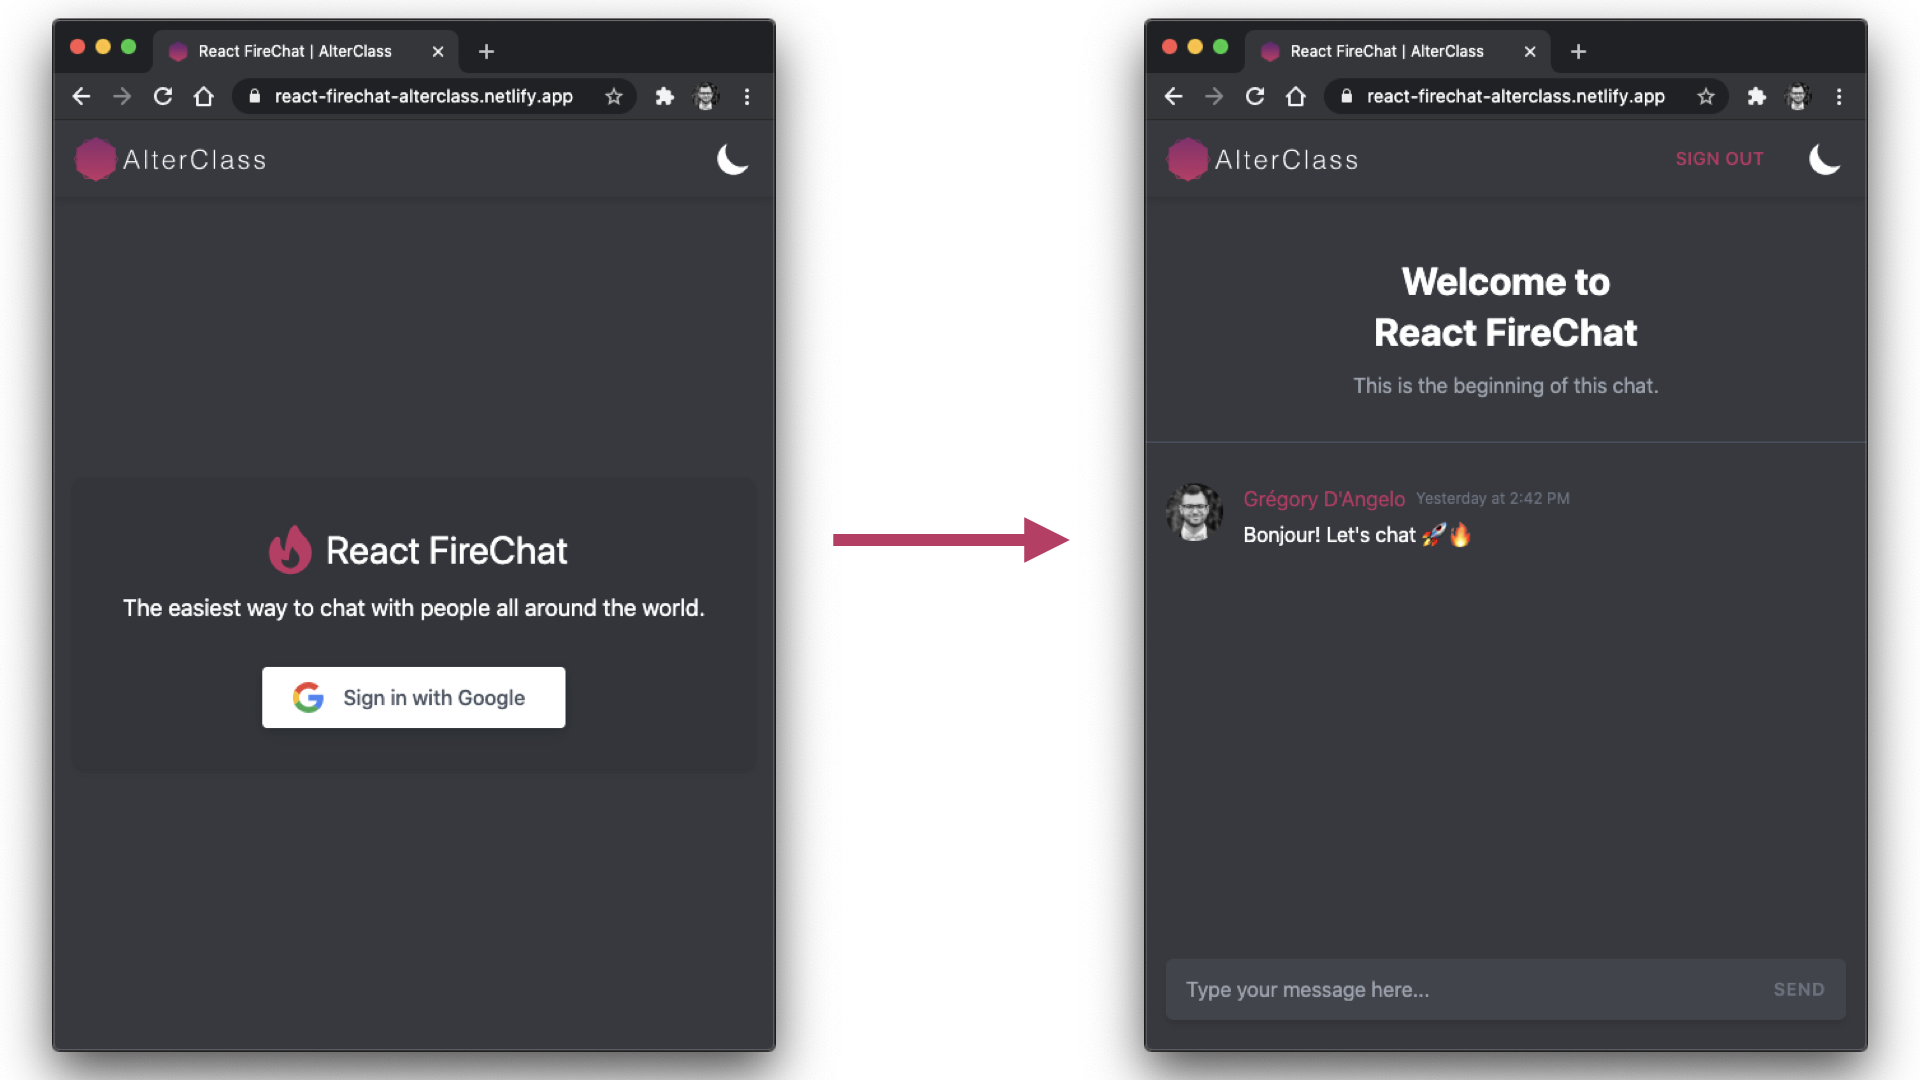
Before we get started, let's have a quick look at what we are building today.
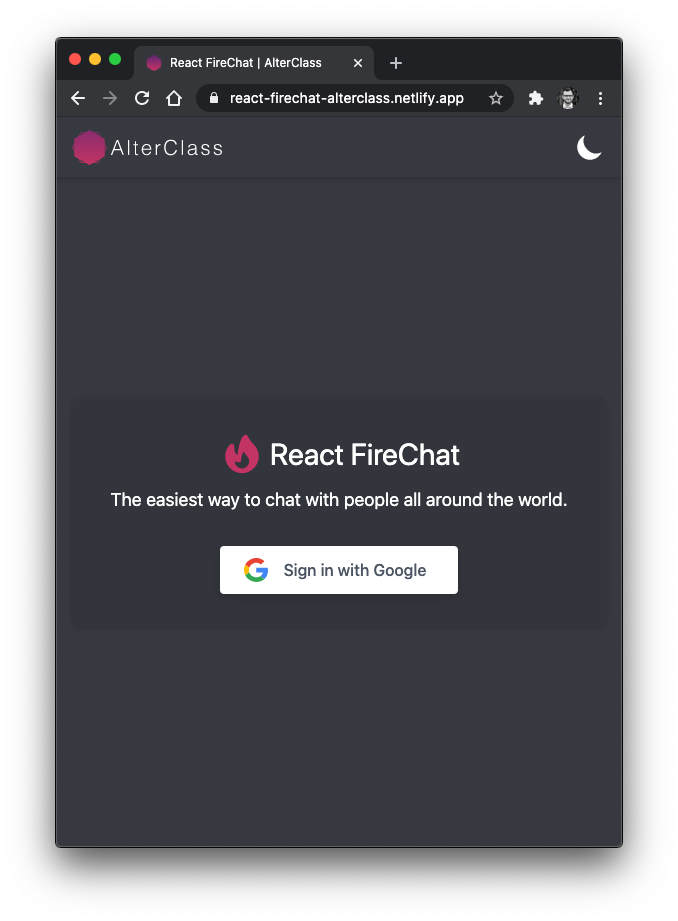
It's a simple but powerful chat application that everybody can use to communicate using text messages. It's like a Discord server or a Slack room with a single channel.
To enter the chat and interact with people, the user must log in using his Google account.
Once logged in, the user can read the previous messages from the chat and start chatting by sending messages.
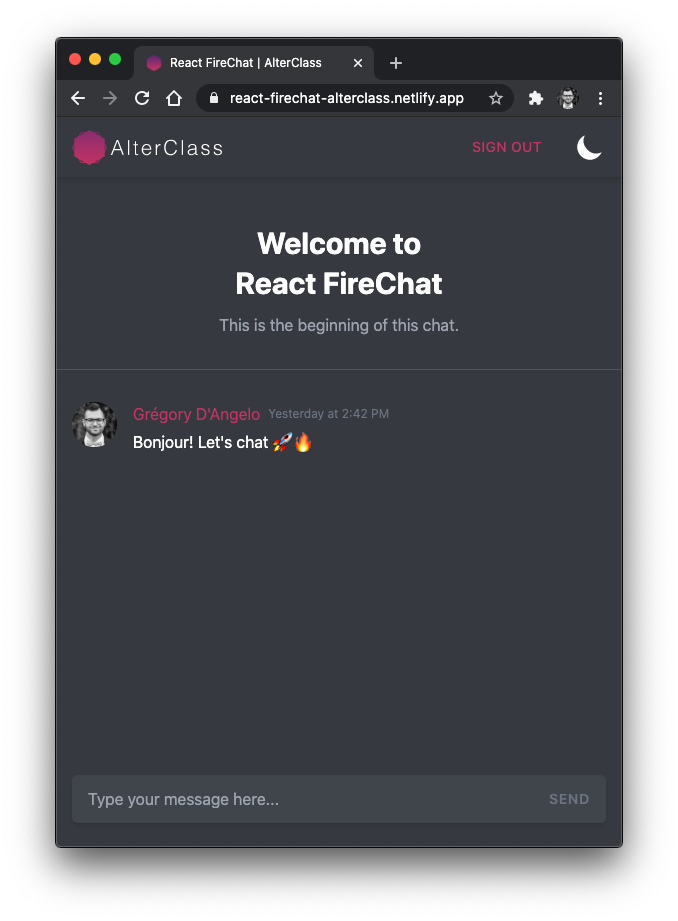
All messages are stored in a Firestore database and are sync in real-time with our React application.
So let's get started! I'll set a timer, and in just 5 minutes, you'll have an up and running real-time chat application.
And remember, at the end of the video, I'll show you how to deploy your app for free in 3 easy steps! So stick with me till the end, and you'll get a lived application.
Create a React app
First of all, we'll need to create a new React application. For that, we are going to use the create-react-app tool to set up our application with just one command line.
So let's go ahead and run that command with the name of our application React FireChat:
npx create-react-app react-firechat
Once it's done, we can install the dependency to work with Firebase, which is the Firebase JS SDK.
npm install --save firebase
Now, let's go ahead and open our App.js file and remove all of the boilerplate code already in place.
function App() {
  return <div></div>;
}

export default App;
Then, import the Firebase SDK along with Firestore for our database and firebase auth for user authentication.
// Firebase deps
import firebase from 'firebase/app';
import 'firebase/auth';
import 'firebase/firestore';
Finally, we need to initialize Firebase in our app by passing in the Firebase project configuration. To get this configuration, we need a Firebase project. So let's create one.
firebase.initializeApp({ ... });
Create a Firebase project
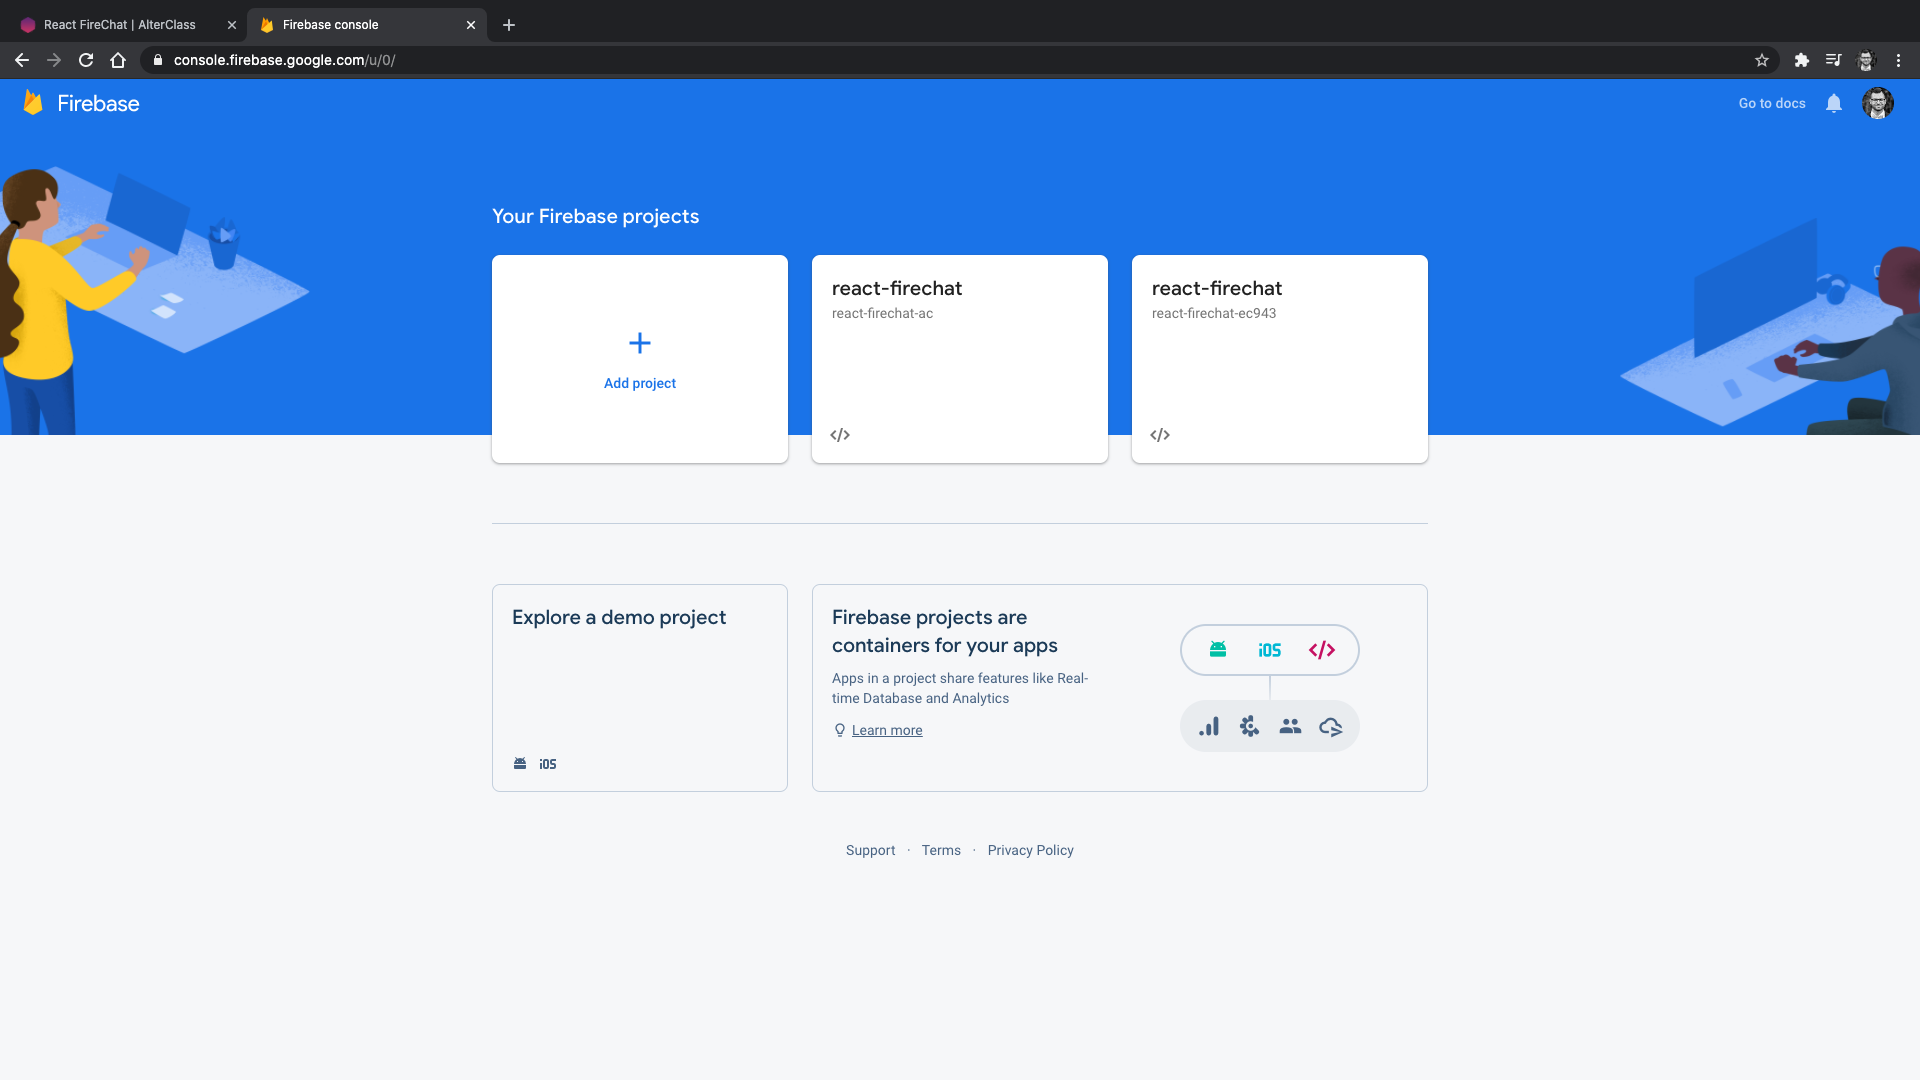
To create a new Firebase project, head over to the Firebase console, click "Add project," and follow through the steps.
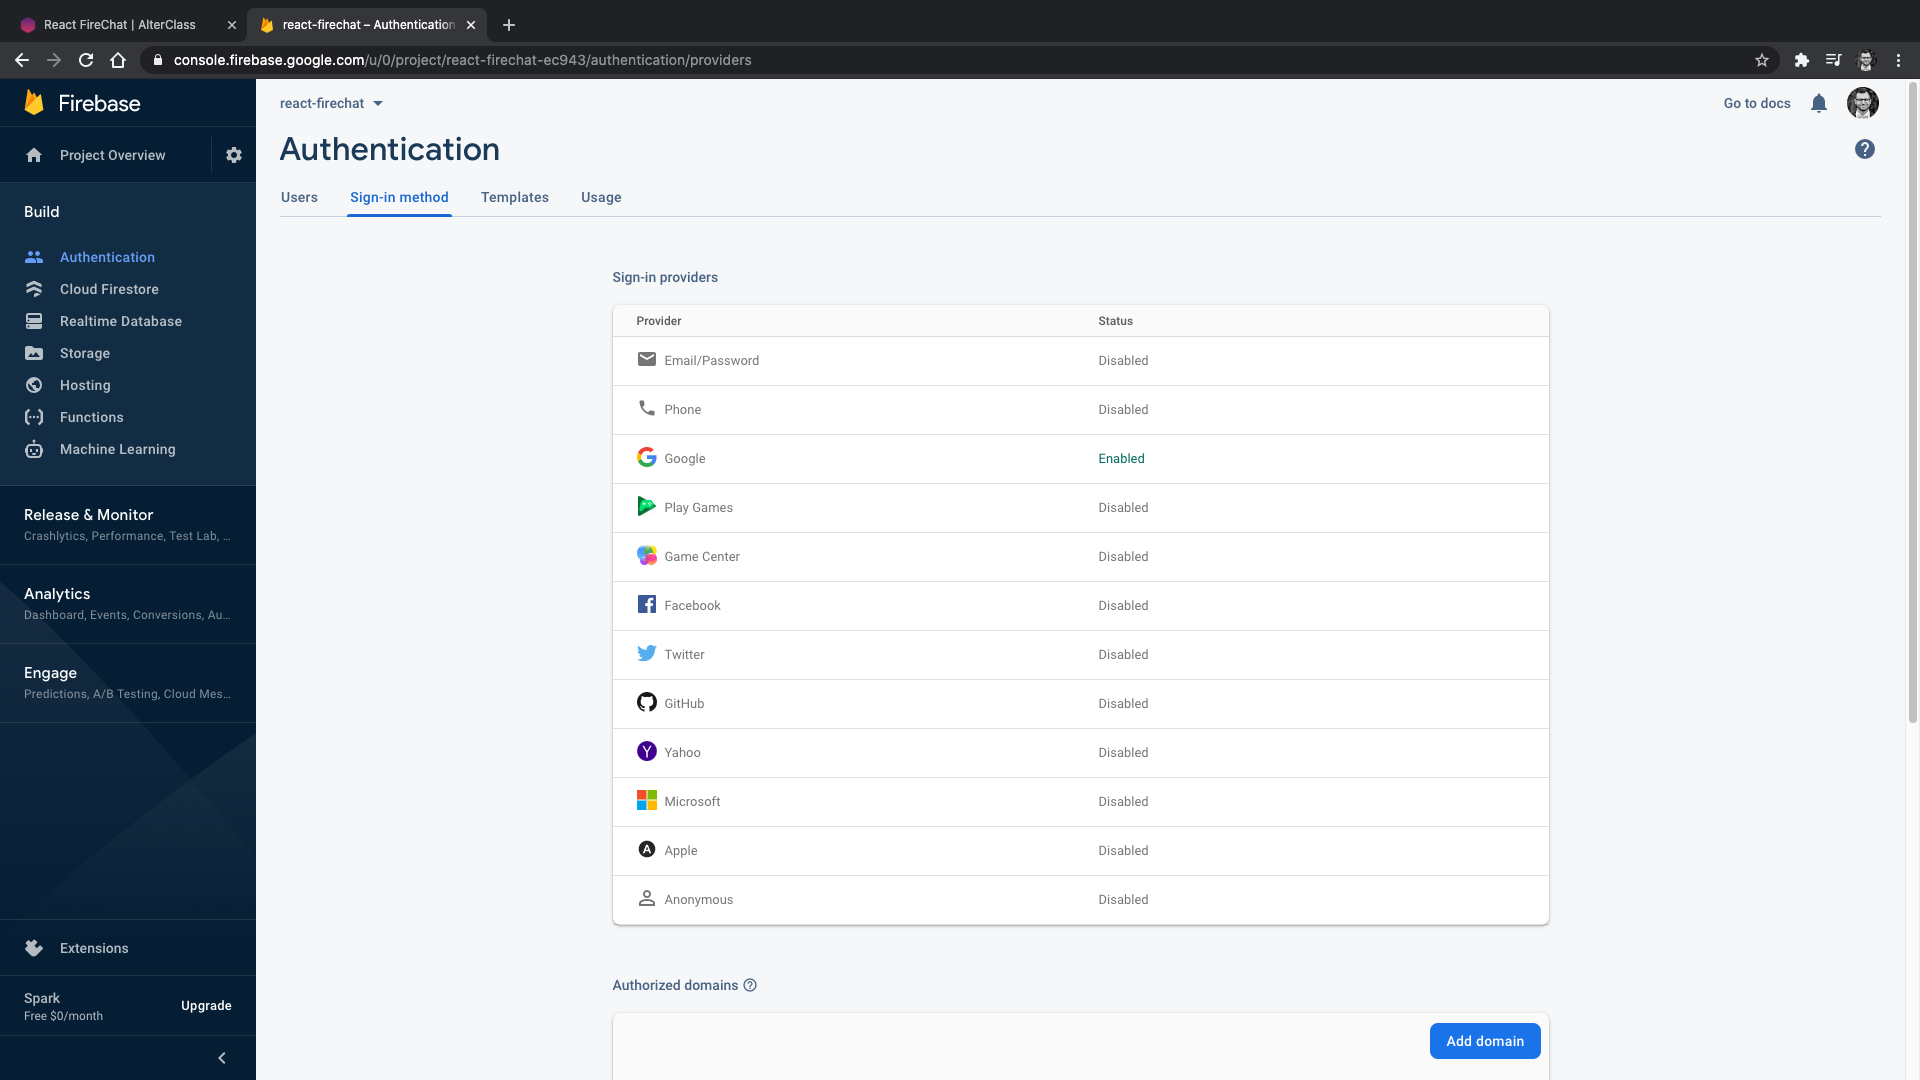
Then, to allow users to sign in using their Google account, we need to enable the Google sign-in method from the authentication page for our project.
And to use Firestore as our database for storing messages, we need to enable it from the Cloud Firestore page.
Finally, the last thing we need to do is to add a new web app to our Firebase project. Once you are done, you should get a JavaScript object representing the configuration of the Firebase project application you just created.
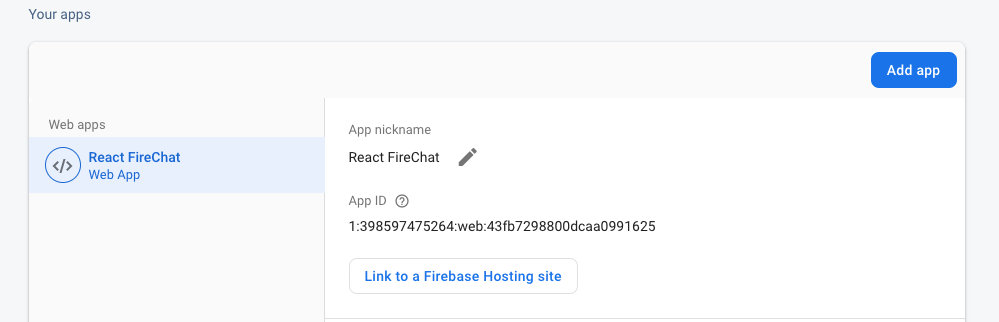
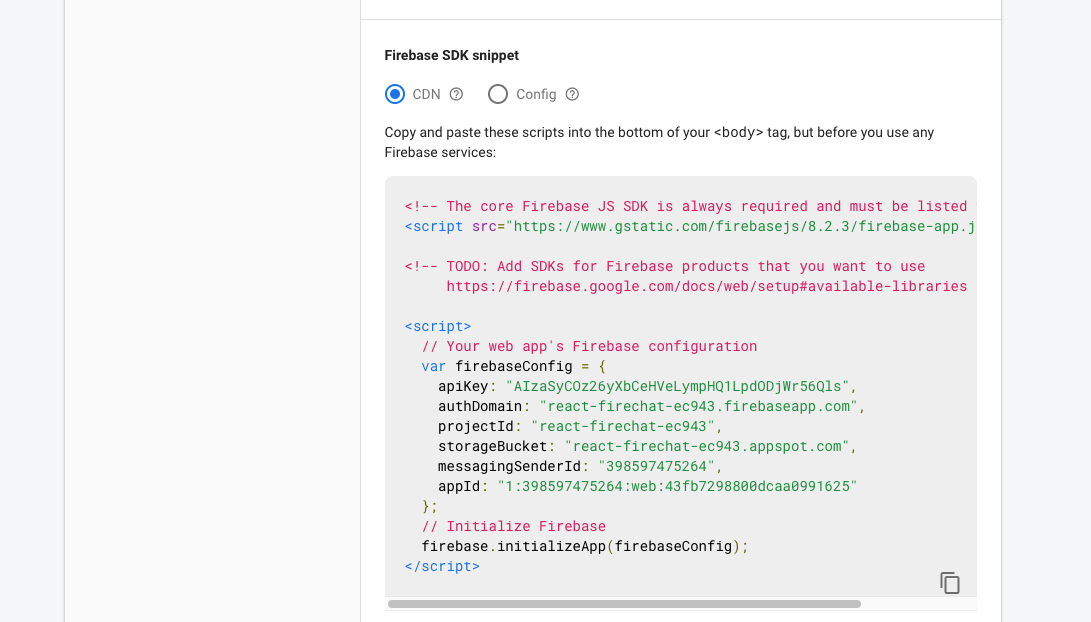
So go ahead and copy this configuration object and paste it into the initializeApp in your source code.
Alright! Now we should have everything we need to build our chat application. We created the React application, the Firebase project, and linked the two together.
So let's build the views of our application.
Define the UI
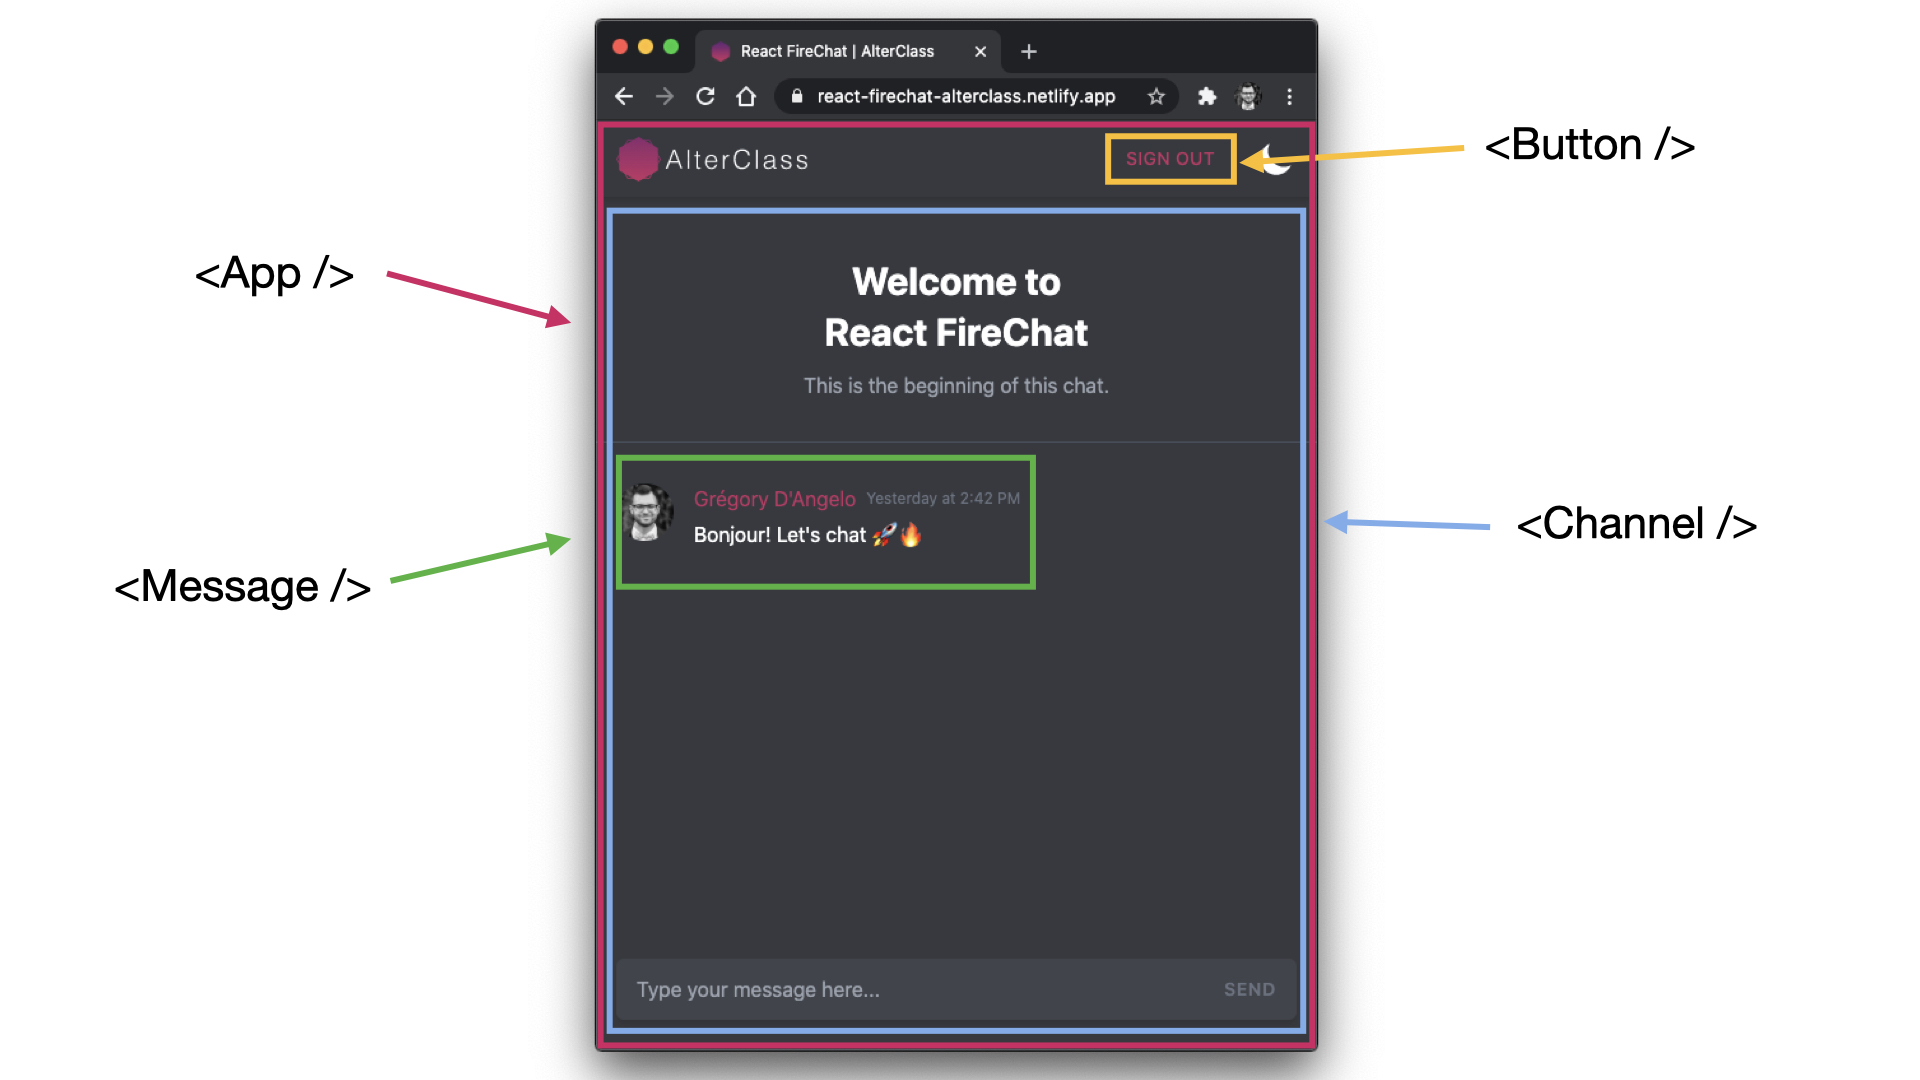
But first, let's see how our application is structured and break the UI down into a component hierarchy.
In this application, if the user is logged in, we show the chat with the list of messages. Otherwise, we show a button to sign in with Google.
In addition to our main App component, we have 3 other React components to create. One for the sign-in and sign-out buttons, one for the channel that contains the list of messages, and the one for the messages themselves.
Google authentication
Sign-in button
So let's start with the sign-in button.
This component is pretty straightforward. It is a simple button that accepts an onClick prop.
const Button = ({ onClick = null, children = null }) => (
  <button onClick={onClick}>{children}</button>
);

export default Button;
From theApp component, we can now render it and implement the onClick event handler.
function App() {
  const signInWithGoogle = async () => {
    // Retrieve Google provider object
    const provider = new firebase.auth.GoogleAuthProvider();
    // Set language to the default browser preference
    firebase.auth().useDeviceLanguage();
    // Start sign in process
    try {
      await firebase.auth().signInWithPopup(provider);
    } catch (error) {
      console.log(error.message);
    }
  };

  return (
    <div>
      <Button onClick={signInWithGoogle}>Sign in with Google</Button>;
    </div>
  );
}
In this event handler, we are starting the sign-in process by using the Google Auth provider from Firebase, we then set the language to the user's preferred language, and we call the signInWithPopup method to prompt the user to sign in through a pop-up window.
Okay, now we need a way to check if the user is authenticated. In this case, we don't show the sign-in button, but instead, we let him enter the chat directly.
We can quickly get access to the authenticated user from Firebase through the auth.currentUser property.
const [user, setUser] = useState(() => auth.currentUser);
But as with many applications, you will also want to know whether your users are currently signed-in or signed-out of your application. Firebase provides a method called onAuthStateChanged, which allows you to subscribe to the user's current authentication state and receive an event whenever that state changes.
Setting such an event listener is something we should do inside the useEffect React hook as it is a side effect.
So let's go ahead and set this up.
const [initializing, setInitializing] = useState(true);
const [user, setUser] = useState(() => auth.currentUser);

useEffect(() => {
  const unsubscribe = firebase.auth().onAuthStateChanged(user => {
    if (user) {
      setUser(user);
    } else {
      setUser(false);
    }
    if (initializing) {
      setInitializing(false);
    }
  });

  // Cleanup subscription
  return unsubscribe;
}, [initializing]);
This method returns a function we can use to clean up our subscription whenever our component unmount.
One more thing, the onAuthStateChanged listener is asynchronous and will trigger an initial state once a connection with Firebase has been established.
Therefore, it is crucial to set up an "initializing" state that blocks our main application from rendering while the connection is established.
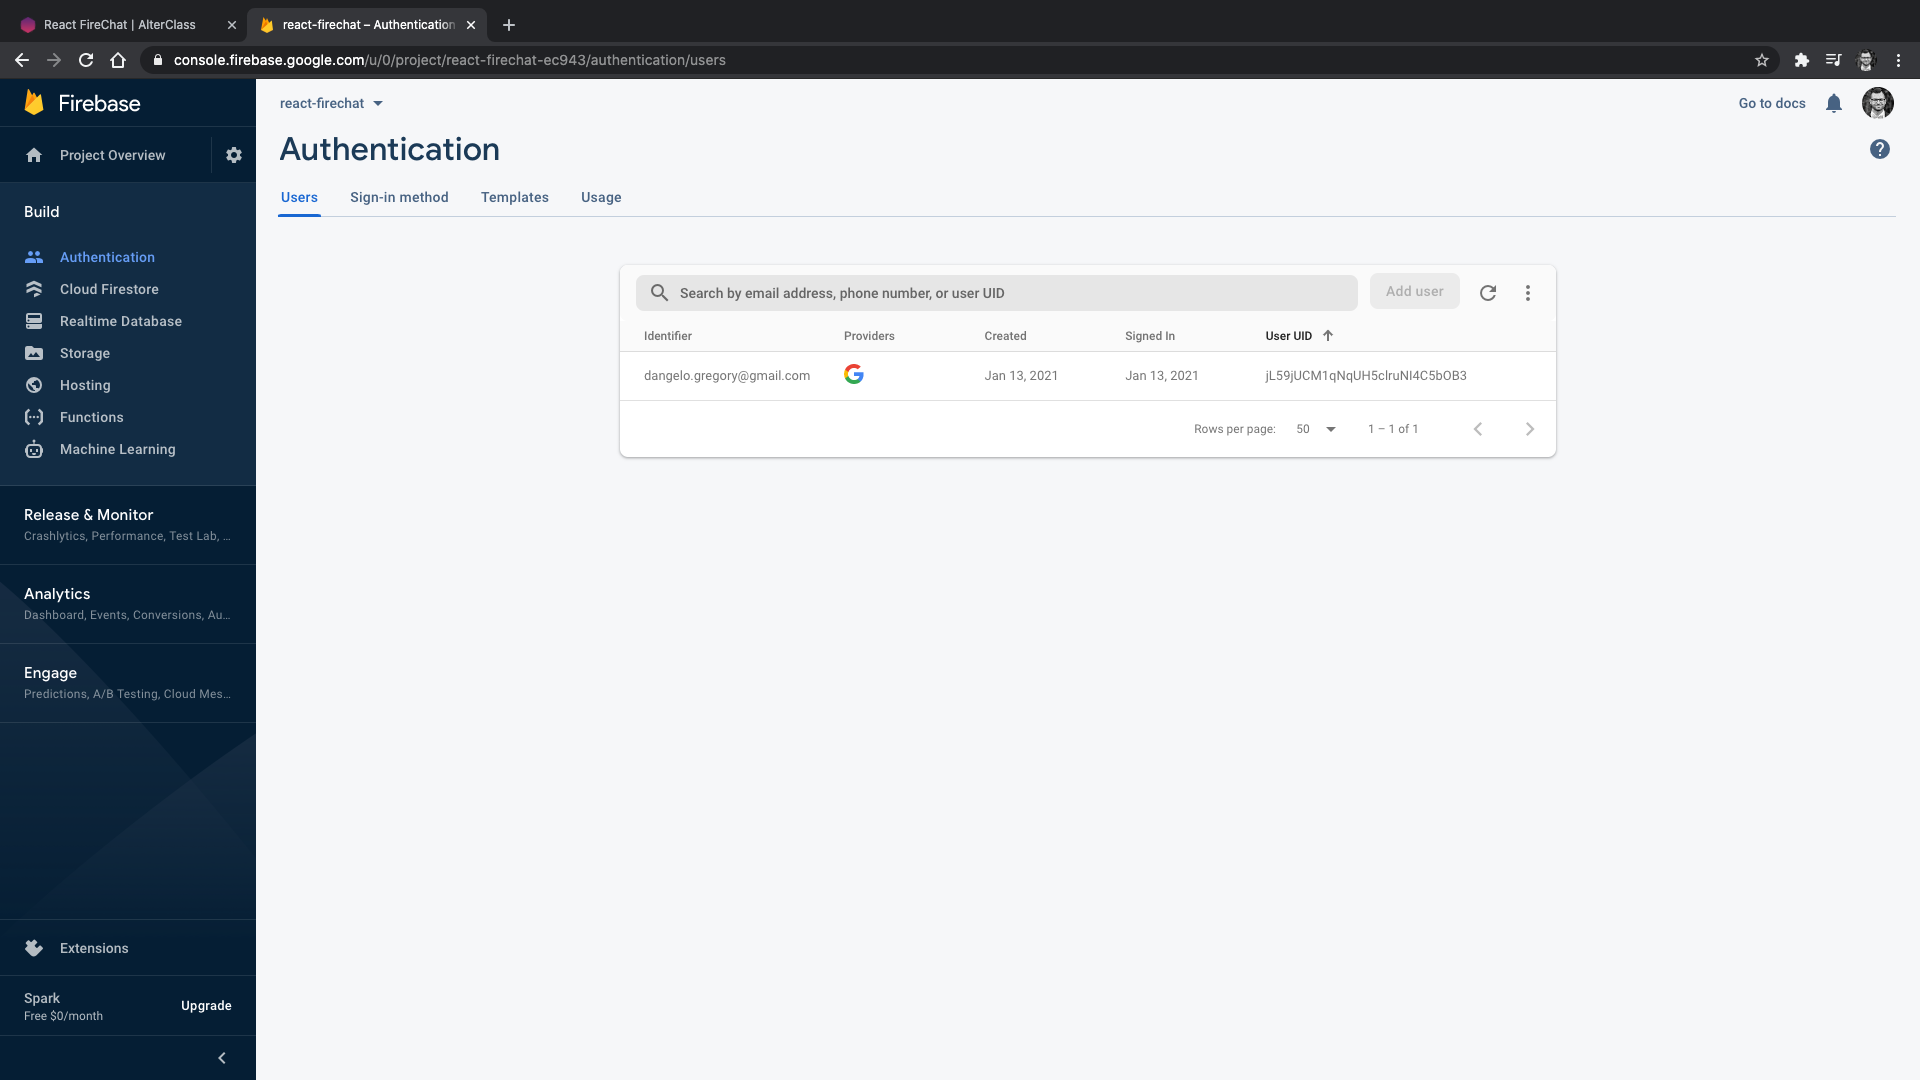
After a user signs in for the first time, a new user account is created and stored as part of your Firebase project. It can be used to identify a user across every app in your project, regardless of how the user signs in.
Sign-out button
Great! Now let's add a sign-out button to allow the user to sign out from our app.
To sign out a user, we can just call the signOut method from the Firebase SDK. And as we have set up a listener to listen for any authentication changes, the user state should be updated automatically and set to null, triggering a re-render of our app, which now display the sign-in button again.
function App() {
  const signInWithGoogle = async () => { ... };

  const signOut = async () => {
    try {
      await firebase.auth().signOut();
    } catch (error) {
      console.log(error.message);
    }
  };

  return (
    <div>
      {
        user ? (
          <>
            <Button onClick={signOut}>Sign out</Button>
            <p>Welcome to the chat!</p>
          </>
        ) : <Button onClick={signInWithGoogle}>Sign in with Google</Button>
      }
    </div>
  );
}
Read data in realtime from Firestore
Now, let's jump into creating the Channel component.
This one is responsible for displaying the chat messages and an input field to allow the user to send new messages to the chat.
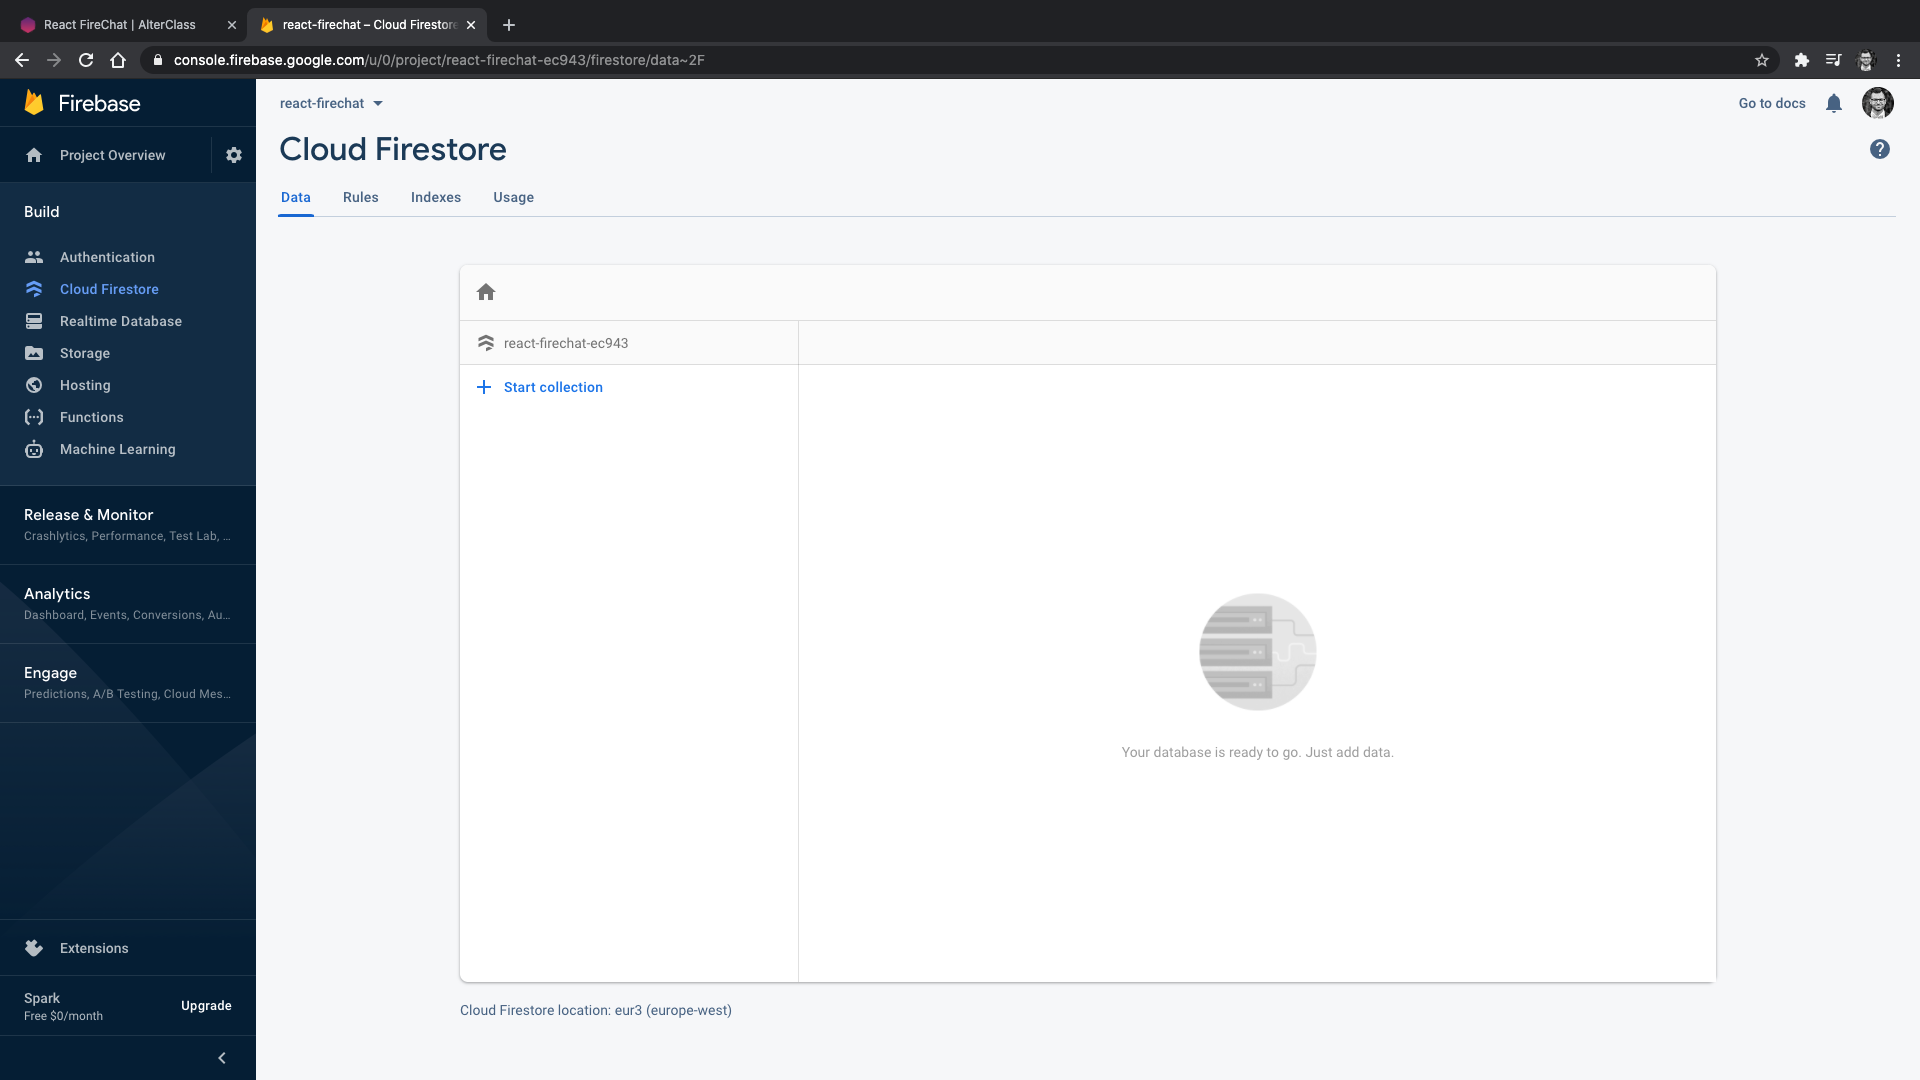
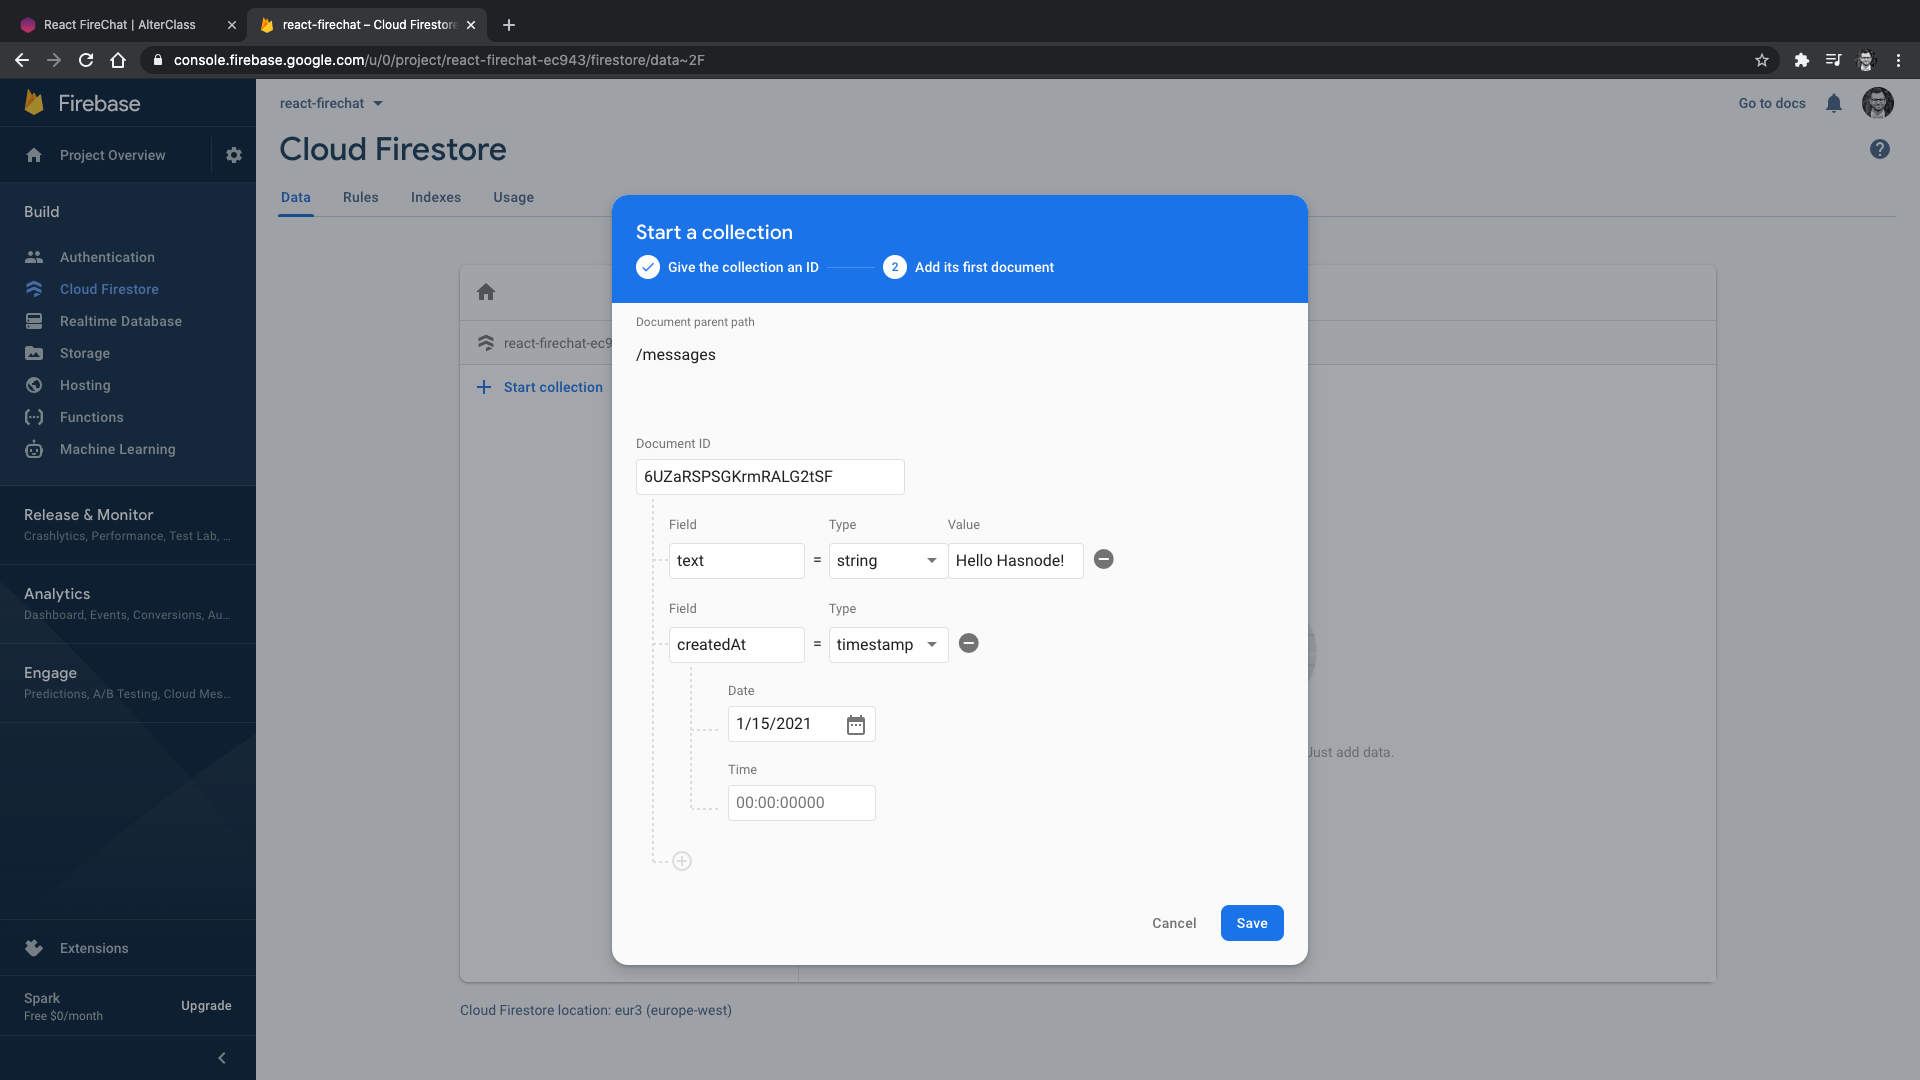
But first, we need to set up our Firestore database from the Firebase console.
Cloud Firestore stores data within "documents," which are contained within "collections." In our case, we'll store the chat messages of our users within a "Messages" collection.
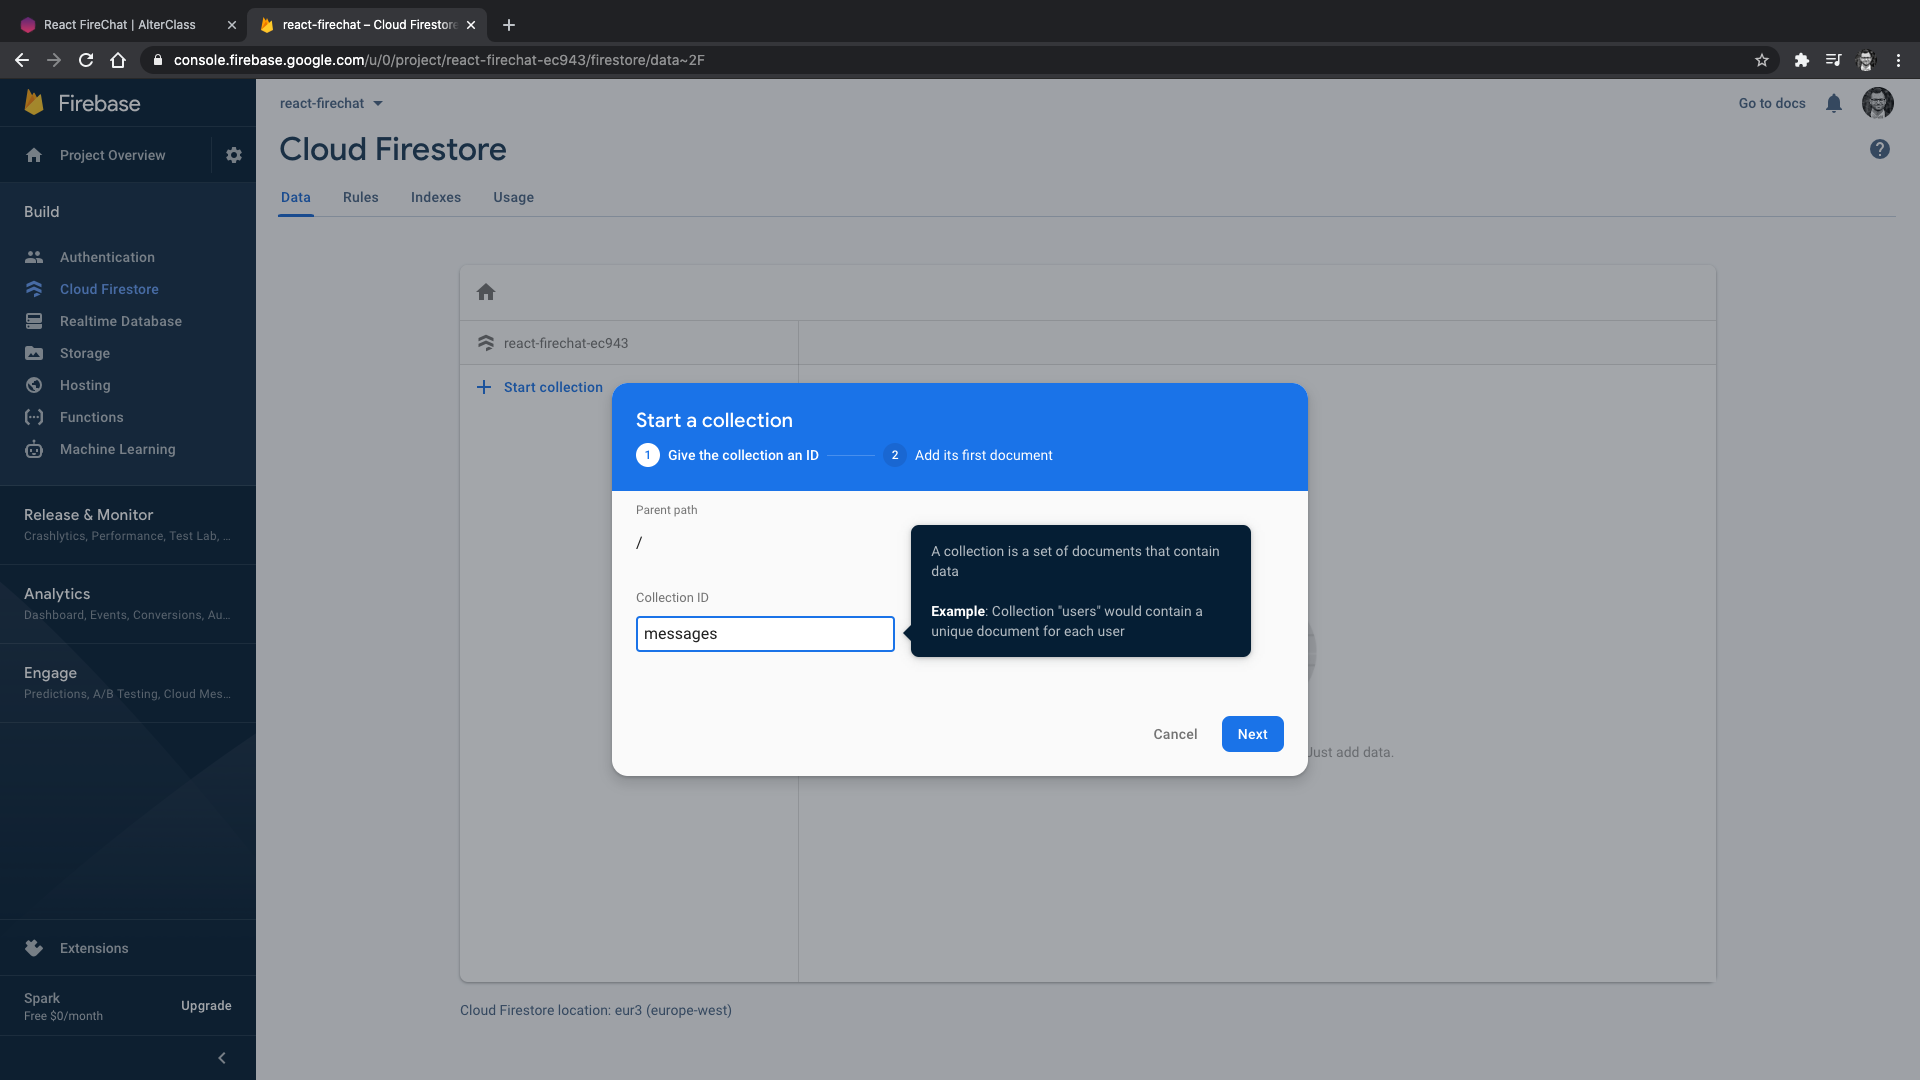
Let's go ahead and also create our first document within this collection.
For now, we just add two fields to this new document. The text of the message itself and a timestamp representing the date and time when the message has been created.
Great! That's all we need. Let's go back to our application.
Within our Channel component, we need to query Firestore for retrieving the messages and render them onto the screen with JSX as usual. So let' start by creating a state variable to store our messages.
const Channel = ({ user = null }) => {
  const [messages, setMessages] = useState([]);
  return <ul></ul>;
};

export default Channel;
Querying data is a side effect. So we'll fetch the messages from within the useEffect hook.
Cloud Firestore provides the ability to read the value of a collection or a document. This can be done in one shot or by listening to real-time updates when the data within a query changes.
In our case, we are only interested in real-time updates. The way we do it with Firestore is by setting up an active listener to react to any changes to the query we want to perform, using the onSnapshot method with an event handler callback.
To watch the "Messages" collection for any changes, we create the following query.
const db = firebase.firestore();
const query = db.collection('messages').orderBy('createdAt').limit(100);
We get the reference to the collection, order it by the createdAt property, and finally, we limit the number of messages returned from the query.
This one is up to you. For simplicity here, we limit it to 100 messages. You can also use query cursors to read the messages by batches.
Now that we have our query, we can set up our event listener with the onSnapshot method. It also returns a function, allowing us to unsubscribe from events to clean up our side effects when the component unmounts.
useEffect(() => {
  // Subscribe to query with onSnapshot
  const unsubscribe = query.onSnapshot(querySnapshot => {
    ...
  });

  // Detach listener
  return unsubscribe;
}, []);
Once a query has returned a result, Firestore returns a QuerySnapshot. These snapshots provide the ability to actually get the data we requested through our query.
To access all the documents returned by our query, we can just get it from the docs property of the QuerySnapshot and loop over it to get the data for each document alongside the document id.
useEffect(() => {
  // Subscribe to query with onSnapshot
  const unsubscribe = query.onSnapshot(querySnapshot => {
    // Get all documents from collection - with IDs
    const data = querySnapshot.docs.map(doc => ({
      ...doc.data(),
      id: doc.id,
    }));
  });

  // Detach listener
  return unsubscribe;
}, []);
Finally, we update our state and render the messages.
useEffect(() => {
  // Subscribe to query with onSnapshot
  const unsubscribe = query.onSnapshot(querySnapshot => {
    // Get all documents from collection - with IDs
    const data = querySnapshot.docs.map(doc => ({
      ...doc.data(),
      id: doc.id,
    }));
    // Update state
    setDocs(data);
  });

  // Detach listener
  return unsubscribe;
}, []);
So, if we create a new message in our Firestore collection, we should see it automatically appear on the screen.
// Channel.js
const Channel = ({ user = null }) => {
  const [messages, setMessages] = useState([]);

  useEffect(() => { ... });

  return (
    <ul>
      {messages.map(message => (
        <li key={message.id}>{message.text}</li>
      ))}
    </ul>
  );
};

// App.js
function App() {
  ...

  return (
    <div>
      {
        user ? (
          <>
            <Button onClick={signOut}>Sign out</Button>
            <Channel user={user} />
          </>
        ) : <Button onClick={signInWithGoogle}>Sign in with Google</Button>
      }
    </div>
  );
}
Add data to Firestore
Alright! Now let's add the ability to create new messages from our application.
To achieve that, we can create a form with a single input field inside our Channel component.
const Channel = ({ user = null }) => {
  const [messages, setMessages] = useState([]);
  const [newMessage, setNewMessage] = useState('');

  ...

  const handleOnChange = e => {
    setNewMessage(e.target.value);
  };

  return (
    <>
      <ul>
        {messages.map(message => (
          <li key={message.id}>{message.text}</li>
        ))}
      </ul>
      <form
        onSubmit={handleOnSubmit}>
        <input
          ref={inputRef}
          type="text"
          value={newMessage}
          onChange={handleOnChange}
          placeholder="Type your message here..."
        />
        <button
          type="submit"
          disabled={!newMessage}
        >
          Send
        </button>
      </form>
    </>
  );
};
And implement the onSubmit event handler to add the new messages to our Firestore database.
It's actually pretty easy to do as we already have everything in place. Again we are using the messages collection reference from the Firebase SDK and call the add method by passing in an object representing the data of the new message.
const handleOnSubmit = e => {
  e.preventDefault();

  const trimmedMessage = newMessage.trim();
  if (trimmedMessage) {
    // Add new message in Firestore
    messagesRef.add({
      text: trimmedMessage,
      createdAt: firebase.firestore.FieldValue.serverTimestamp(),
      uid,
      displayName,
      photoURL,
    });
    // Clear input field
    setNewMessage('');
  }
};
So we have the text itself, the createdAt timestamp - here, we let Firebase setting the value using a server-generated timestamp - and then we have the user ID, the user displayName, and his photoURL. We get this information from the parent component through props.
const { uid, displayName, photoURL } = user;
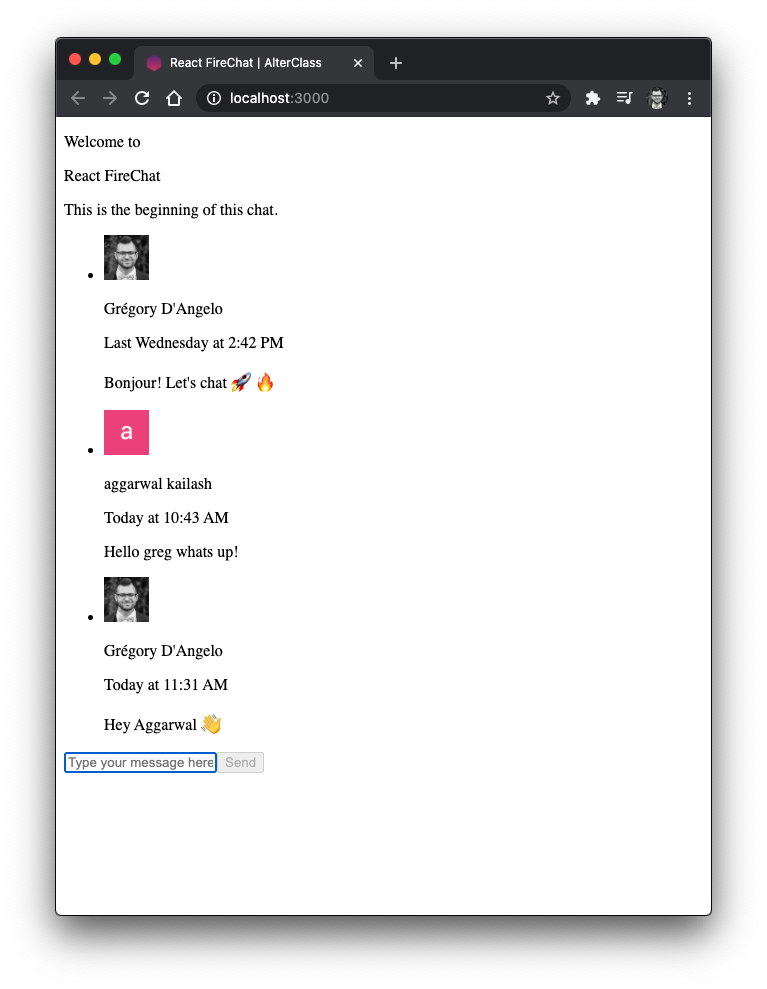
Here you go! Now our users can post messages, and others can read them in real-time.
One more thing, now that we are attaching user information to each message, let's add the photo and name of the user next to each message on the chat.
To do so, we can create a last component called Message to render each individual message from within the Channel component.
// Message.js
const Message = ({
  createdAt = null,
  text = '',
  displayName = '',
  photoURL = '',
}) => {
  if (!text) return null;

  return <div></div>;
};

// Channel.js
const Channel = ({ user = null }) => {
  ...

  return (
    <>
      <ul>
        {messages.map(message => (
          <li key={message.id}>
            <Message {...message} />
          </li>
        ))}
      </ul>
    </>
  );
};
This component is responsible for formatting and rendering the message's data. So we have the user's photo and display name, the creation date that we convert to a more readable format using the date-fns library, and finally, we have the text of the message.
import { formatRelative } from 'date-fns';

const formatDate = date => {
  let formattedDate = '';
  if (date) {
    // Convert the date in words relative to the current date
    formattedDate = formatRelative(date, new Date());
    // Uppercase the first letter
    formattedDate =
      formattedDate.charAt(0).toUpperCase() + formattedDate.slice(1);
  }
  return formattedDate;
};

const Message = ({
  createdAt = null,
  text = '',
  displayName = '',
  photoURL = '',
}) => {
  if (!text) return null;

  return (
    <div>
      {photoURL ? (
        <img
          src={photoURL}
          alt="Avatar"
          className="rounded-full mr-4"
          width={45}
          height={45}
        />
      ) : null}
      {displayName ? <p>{displayName}</p> : null}
      {createdAt?.seconds ? (
        <span>{formatDate(new Date(createdAt.seconds * 1000))}</span>
      ) : null}
      <p>{text}</p>
    </div>
  );
};
So now you have a powerful real-time chat application built with React and Firebase!
I know what you think right now! The application looks terrible. There is no way our users gonna use it like that. So let's use our magic CSS wand and turn this awful app into something like this.
Much better right?
That's not a video/article about CSS, so I'll save your time and energy and link the source code here so you can get through it.
I don't even use and write plain CSS anymore for my React applications. In fact, I'm using Tailwind CSS to rapidly add styles to my apps. It is one of those tools that once you start using it, you can't stop using it. I promise Tailwind CSS is such a life-changer.
If you'd like me to create a video or a tutorial about it, please let me know in the comments section below.
And have a look at the Github repository for the source code of the app we just built.
Bonus
For learning how to deploy this app for free in 3 easy steps, go watch the video on YouTube, and see me going through the steps.
What's next?
Now I invite you to go a step further and add more features to it.
For example, you could implement an AI-powered moderation strategy and include it in your app to moderate users' messages automatically and ban the ones that break your community guidelines.
You could also add payments to your application using tools like Stripe, for example.
You got the point here. Possibilities are endless. This application is just a starting point. Grab the source code, and work from there to build your own application.
Conclusion
Alright! That's it, guys. Thank you so much for watching this video (or reading the article) up to the very end.
I really hope that this video was useful for you guys. Please share it with your friends and colleagues or whoever may be interested in building applications with React.
And if you have not yet subscribed, don't forget to subscribe to AlterClass on Youtube, hit the like button, and ring the bell if you want to be notified every time I release a new video.
Thank you!
Become a React Developer
And if you need to learn more about building modern web applications with React, go check out my course on AlterClass.io.
My course will teach you everything you need to master React, become a successful React developer, and get hired!

I'll teach all the concepts you need to work with React, you'll get tons of hands-on practice through quizzes and programming assessments, and you'll build real-world projects on your own.

Plus, you'll be part of a growing community of learners.
So go to AlterClass.io, enroll in my course, and start building an amazing portfolio of powerful React applications.


